This week I’ve been continuing to explore the numerous events involved in the 2025 Bradford City of Culture. Alongside dramatic shows and regionwide renovations are updates to the already available public spaces such as parks, libraries, and museums.
One of the new creations for the city and surrounding region is the Peace Museum, found within Salt’s Mill in Saltaire. The Peace Museum explores numerous methods of political activism that have been utilised over the decades. There were posters about conscientious objectors from the first world war, books on the Swiss pacifism of the second world war, pamphlets that were handed out during the Korean war, and a collection of white poppies; a symbol of peace and remembrance for those lost in all wars.
I paused to watch a short documentary projected onto one of the walls. The film talked on the peaceful protests that took place in the United States in the 1960s, on people from different backgrounds and what peace means to them.
The final exhibit I saw in the museum focused on the atomic bombs and the effect they had on Japan. In 1945, the United States dropped two newly developed atomic bombs onto the cities of Hiroshima and Nagasaki; the detonation and resulting fallout caused the death of up to a quarter of a million people, all in a matter of minutes. The exhibit focused on the testimony of survivors, what they saw, and how it still effects them in their daily life. Finally, the survivors were asked what could be done to show remembrance of those lost and how peace can be promoted.
The Crane – A Symbol of Peace
One of the initial survivors of the bombings was Sadako Sasaki, she was two years old at the time. Whilst not dying in the blast, she was exposed to lethal amounts of radiation from the fallout, radiation that would take all of ten years to kill her. In that time, Sadako invoked an ancient Japanese tradition in the hopes that she might live.
The old tale says, if you are to create 1,000 paper cranes you will be granted a wish. Sasaki’s wish was to stay alive and so, given a year to live, she began making as many origami cranes as she could in the hope that she would get her wish. As she folded though, her outlook changed. She began to think that if she were to be granted a wish, she would wish for peace; for no one to be caught in the devastation she was. Sasaki eventually succumbed to her illness and was buried on the island of Kyushu alongside her finished 1,000 paper cranes.
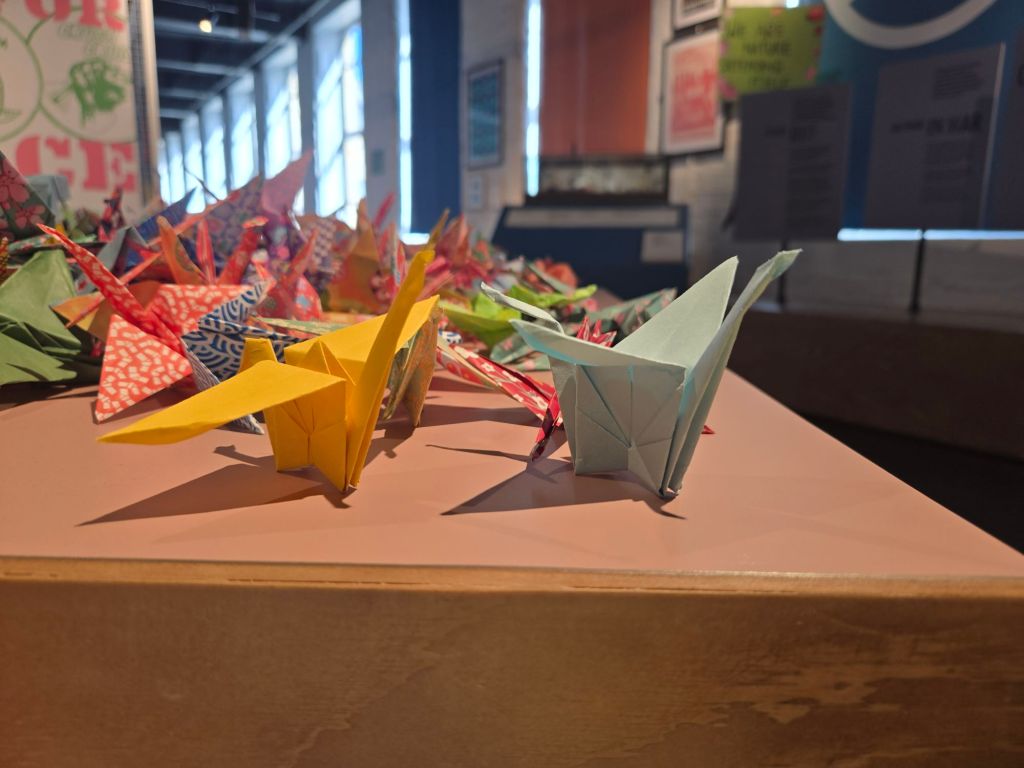
In the years since, the origami crane has become a symbol of hope and peace for the people of Japan and, in honour of that, today I am going to teach you how to fold one yourself.
How to fold an Origami Crane
A key thing to learn for any Origami folding is the base. Often, a lot of Origami instructions start off with the same few steps so we call these bases, and it’s common in instructions to read things like “Make a square base” or “Start with a triangle base”. The Origami Crane I’m going to do today starts with the Square base, so I’ll show how to make one of those first.
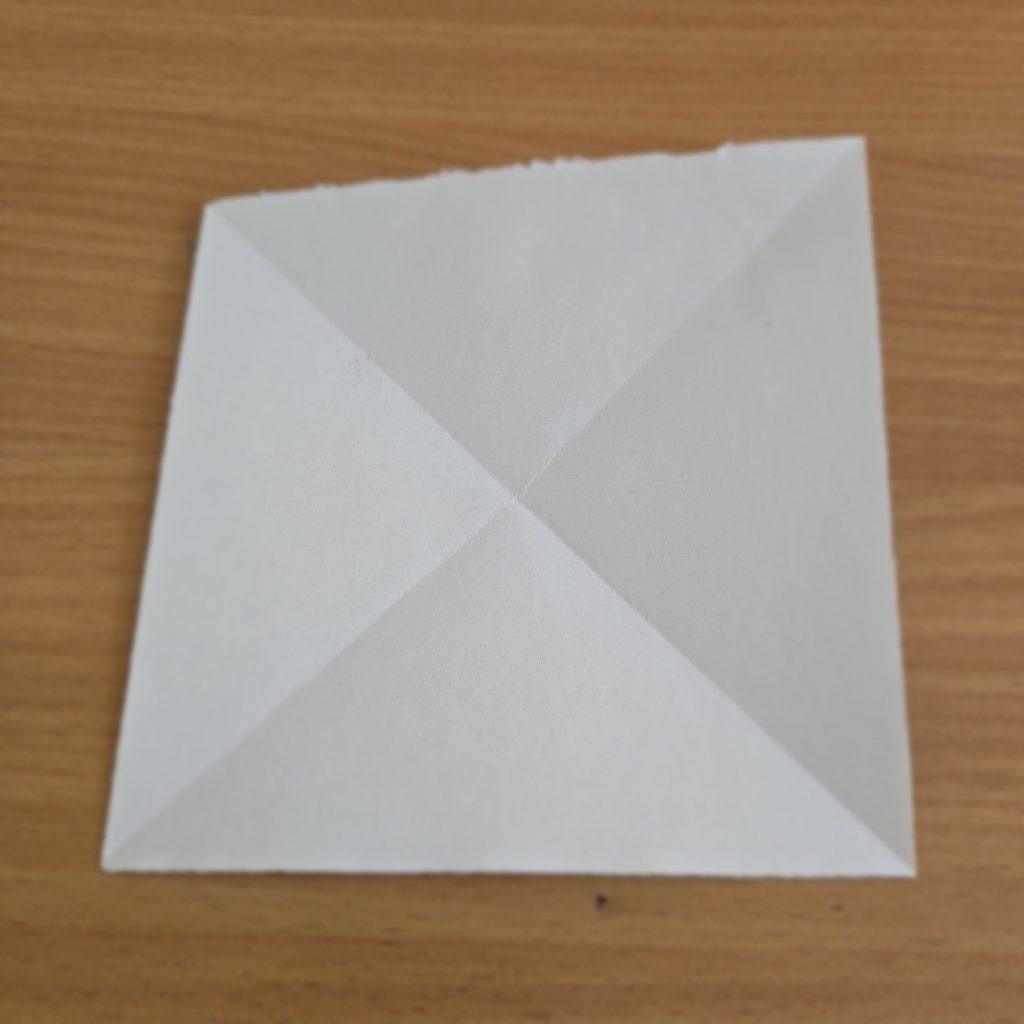
Most Origami folds start with a simple square piece of paper. Often you can buy these in shops, but you can also just cut one out of any size of paper too. With our paper ready, it’s time to fold:
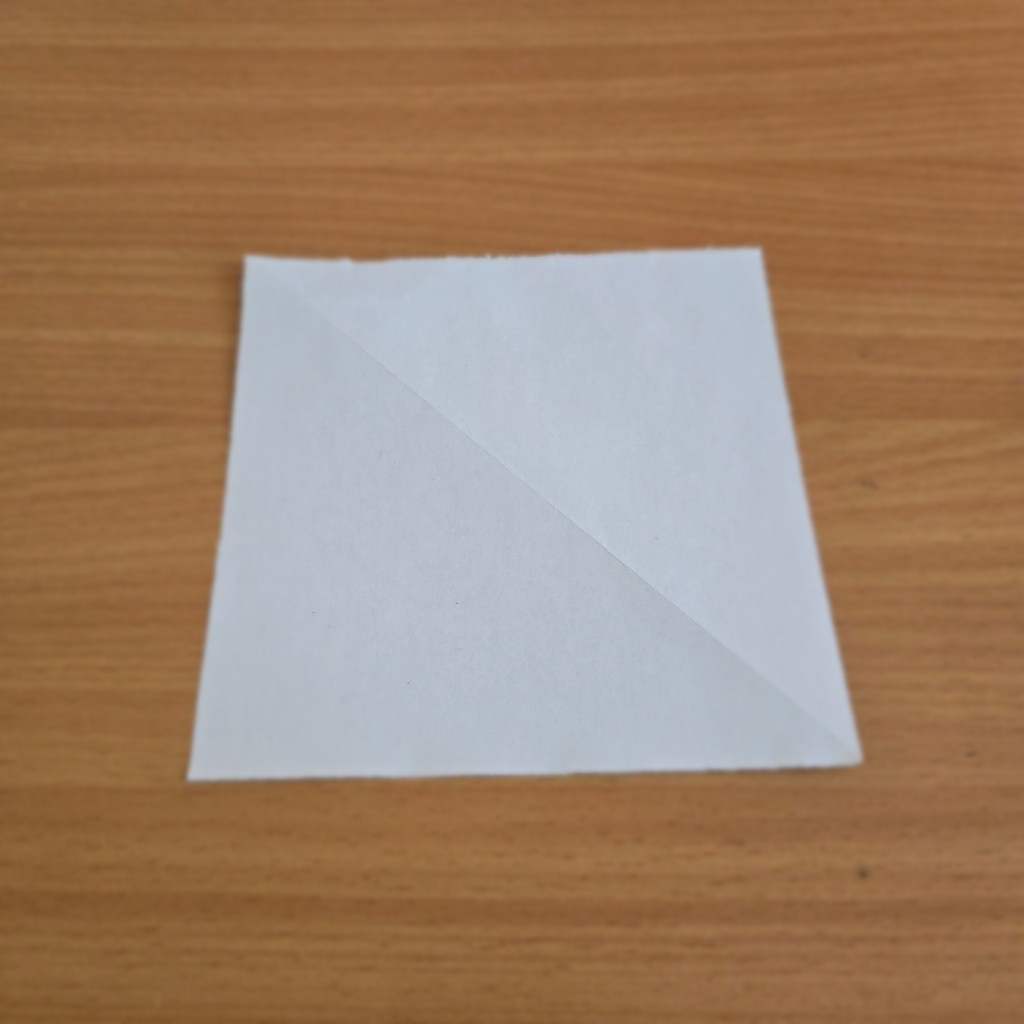
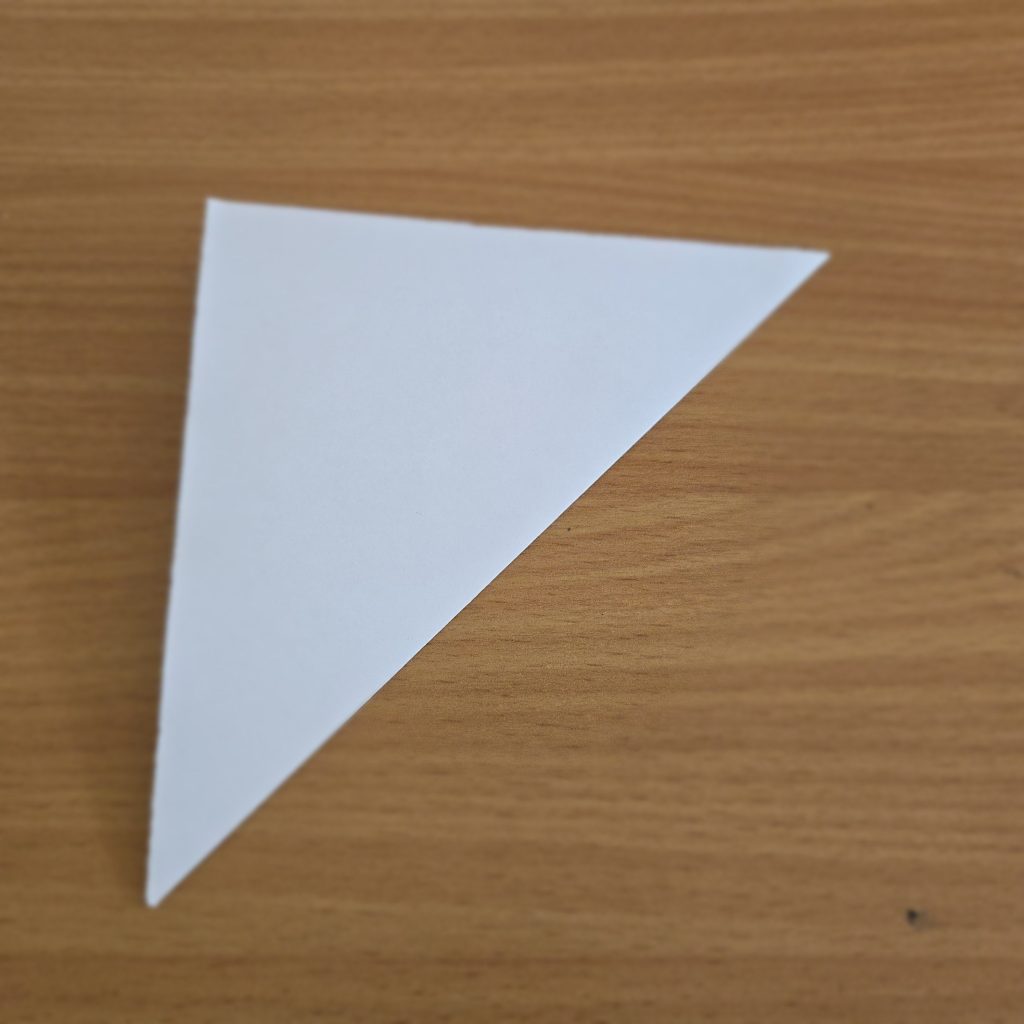
- Fold one corner of the paper over to the other corner and crease along the middle.
2. Unfold this, and then fold the other corner over, creasing in the same way.
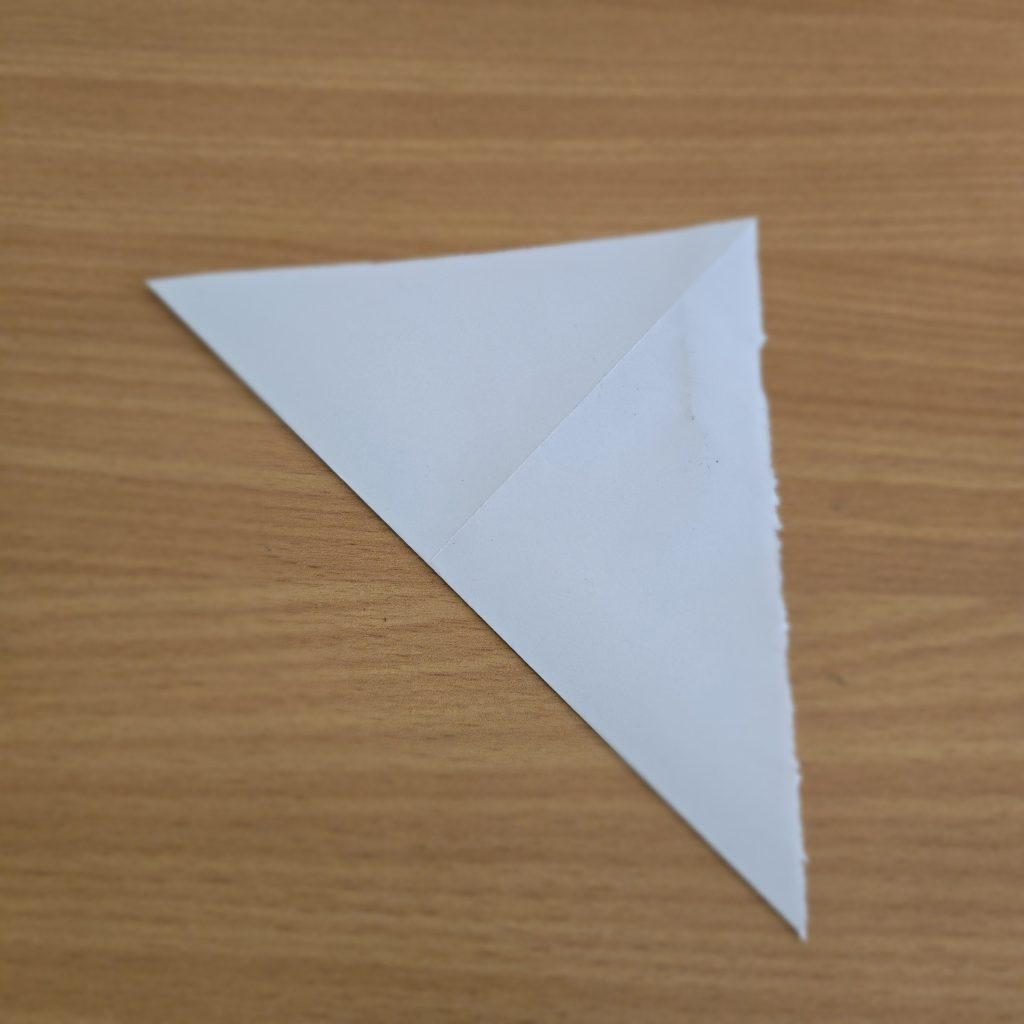
3. Unfold this too and then flip the paper over. You should have a piece of paper with a big X on.
4. Fold the paper in half lengthways, then unfold.

5. Fold the paper in half lengthways the other way, then unfold.
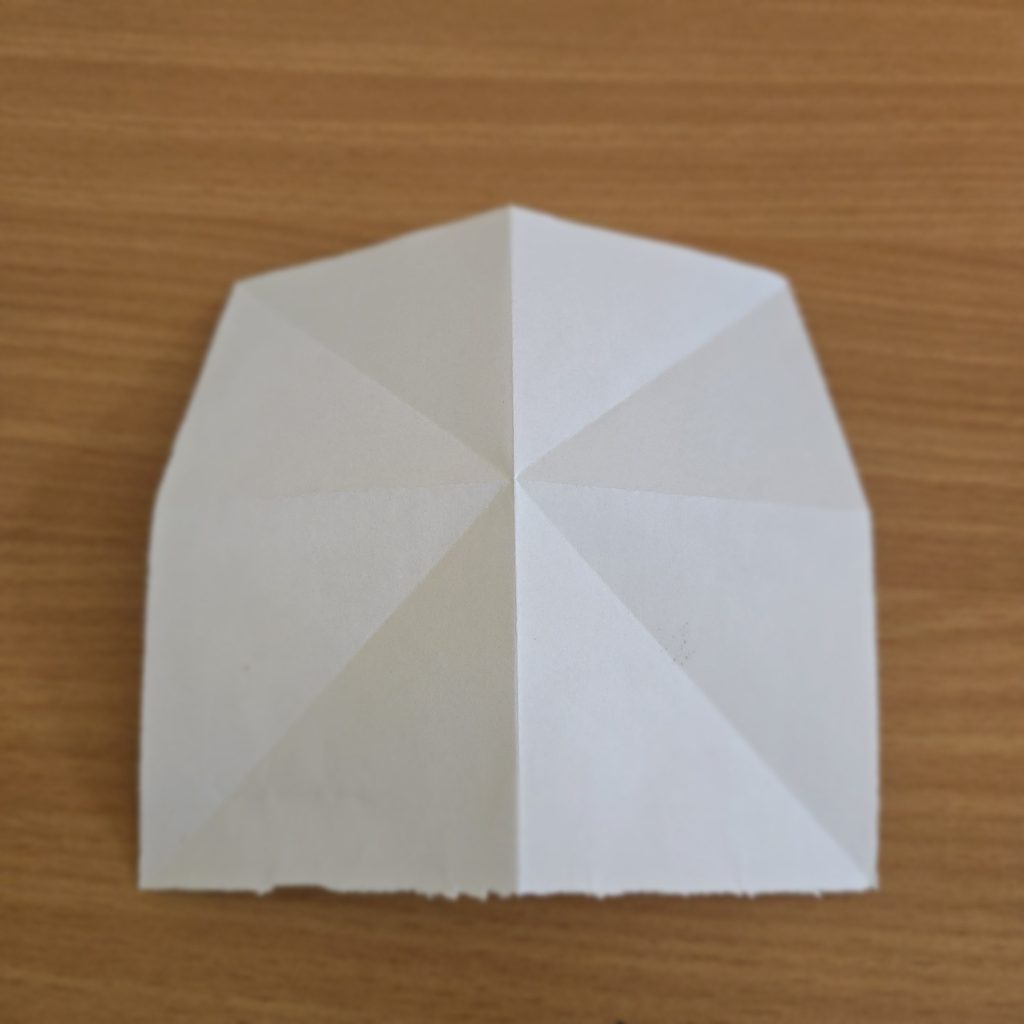
6. Pinch the folds of the paper so that all of the creases previously folded are being folded again.
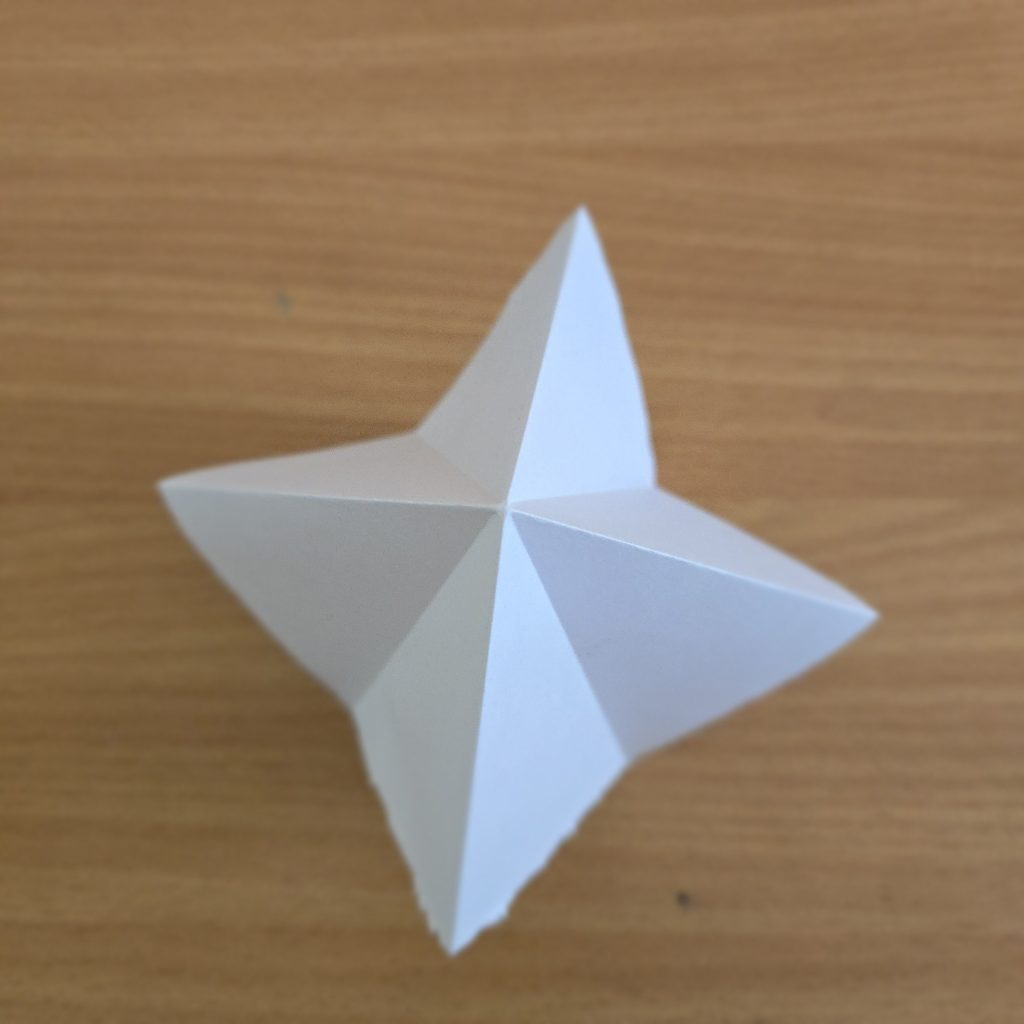
7. Flatten this fold so that you are left with a square that is a quarter the size of the original paper. This is a square base.

This base will be used for the upcoming instructions as mentioned, but feel free to come back and use these instructions to get to the start once more.
Crane
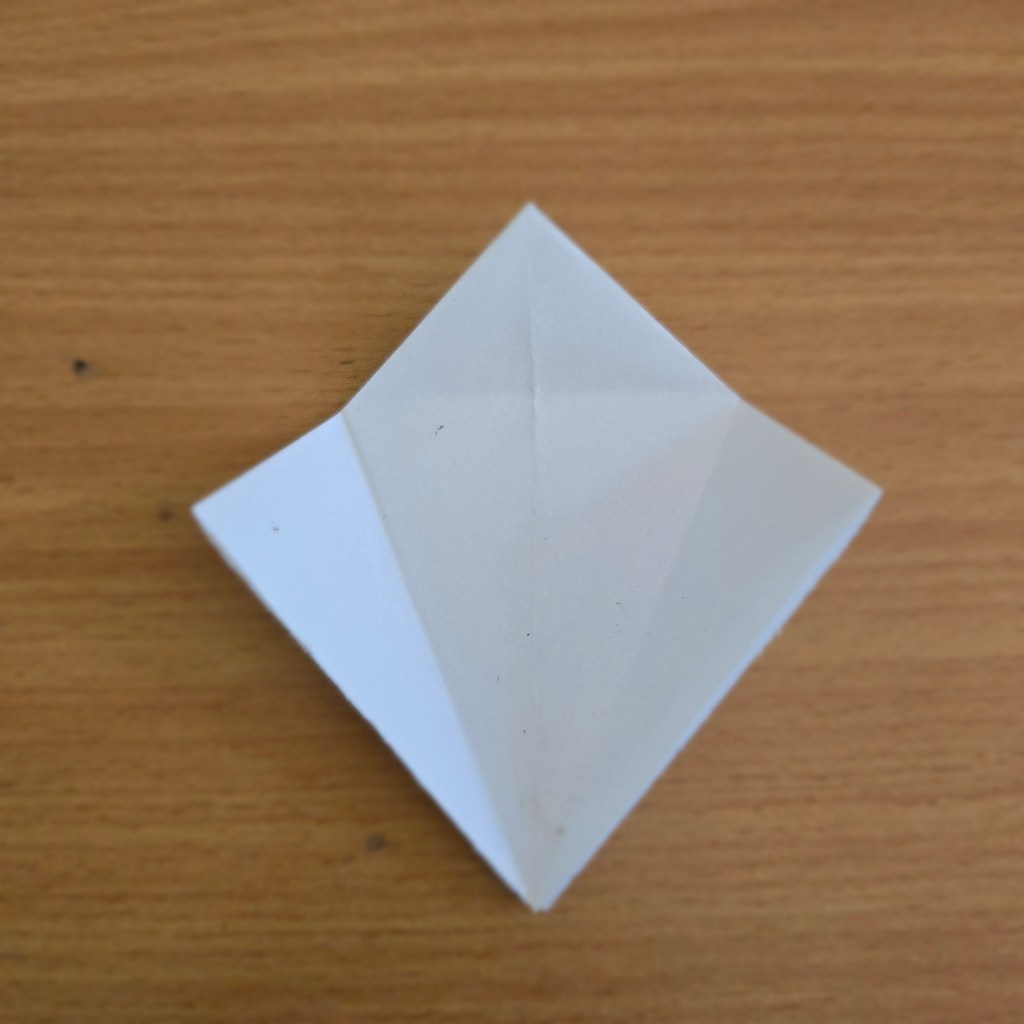
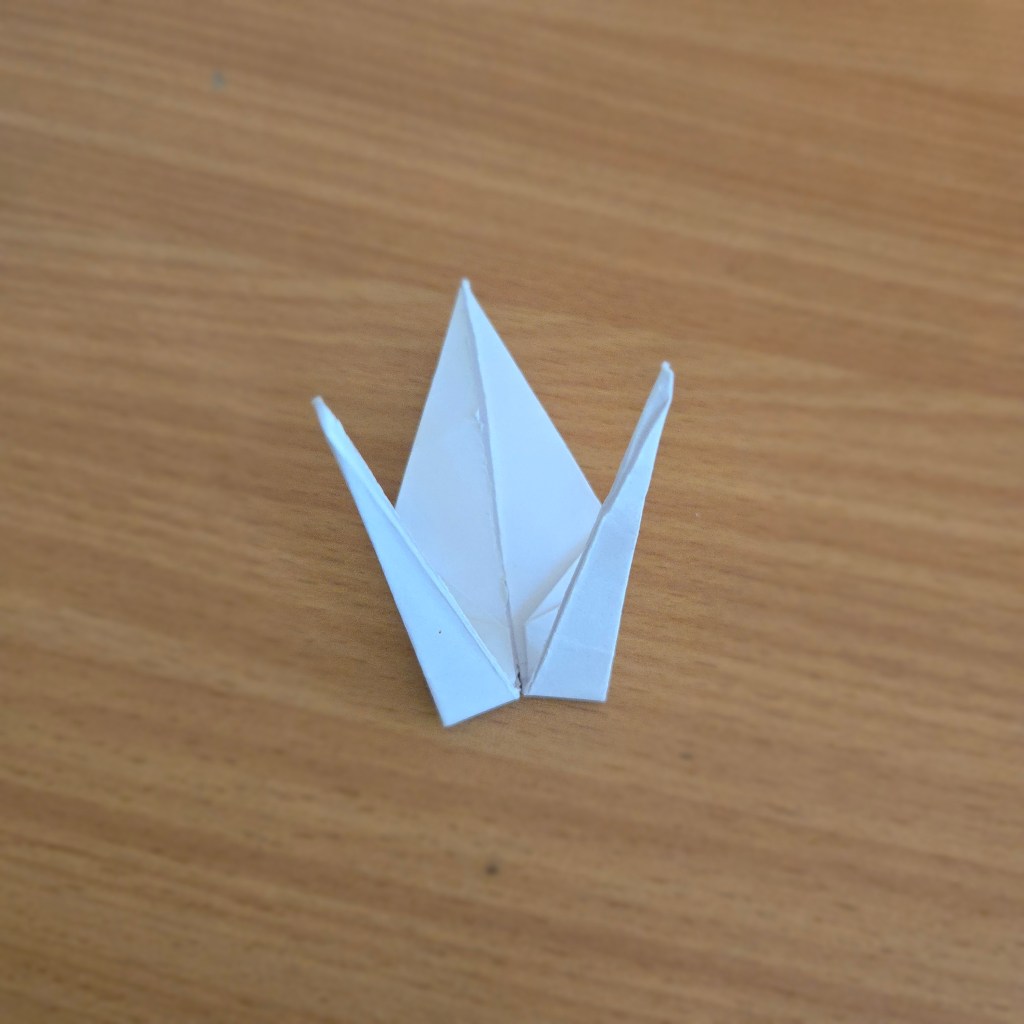
- Start with a square base. One point of the square will be totally open on the inside whilst another is totally closed, for the rest of these instructions the point will be pointed at you.
- Fold the left-hand side corner of the square into the middle so that the edge of the square lines up with the central crease.
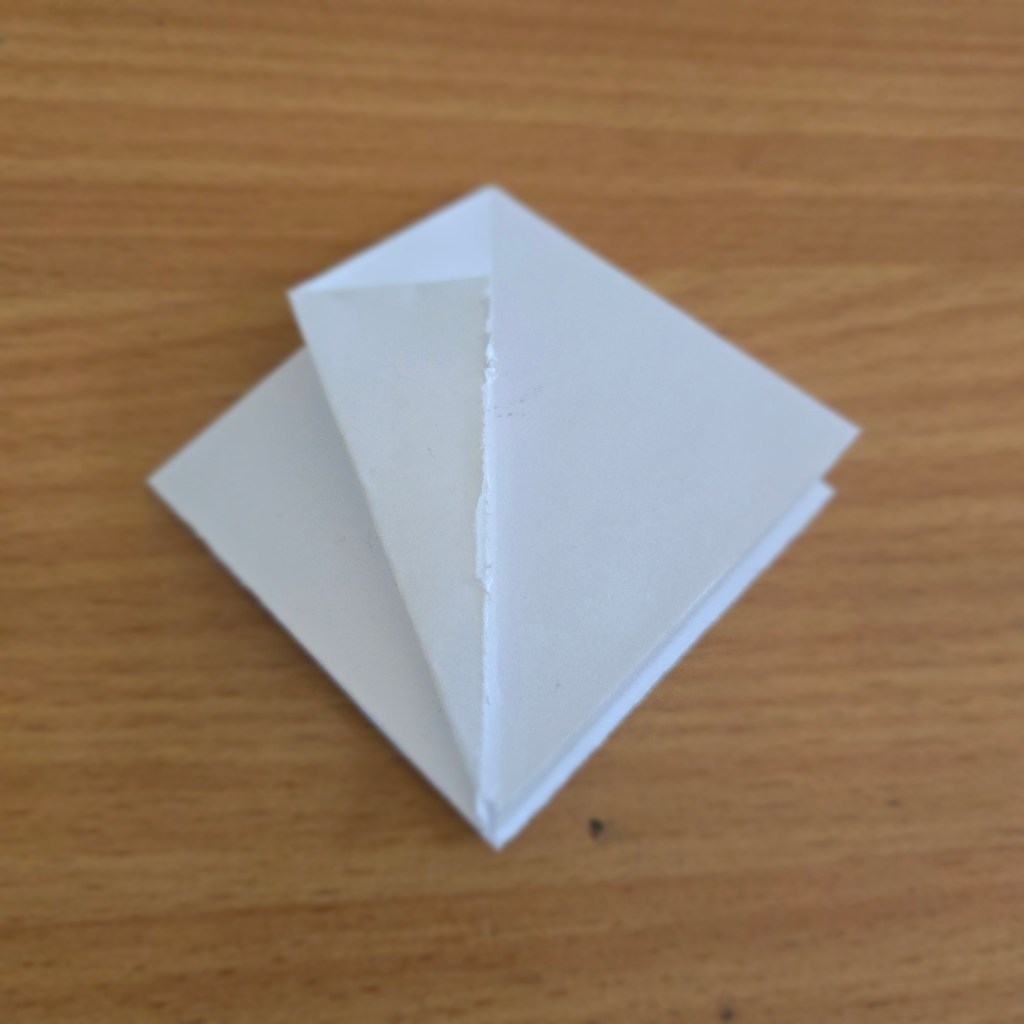
3. Repeat this step for the right-hand side corner.
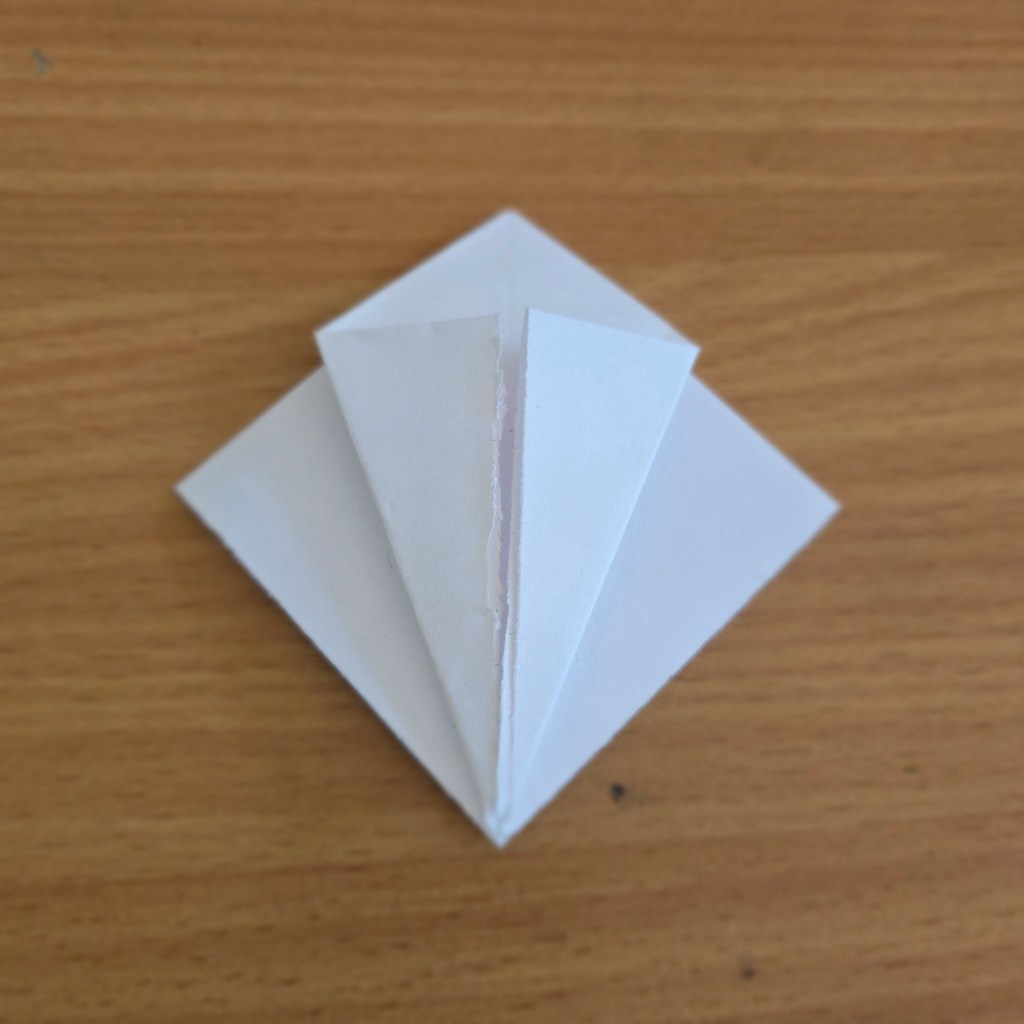
4. Flip the paper over and repeat steps 2 and 3 on the two side corners here. You should end up with a kit shape.
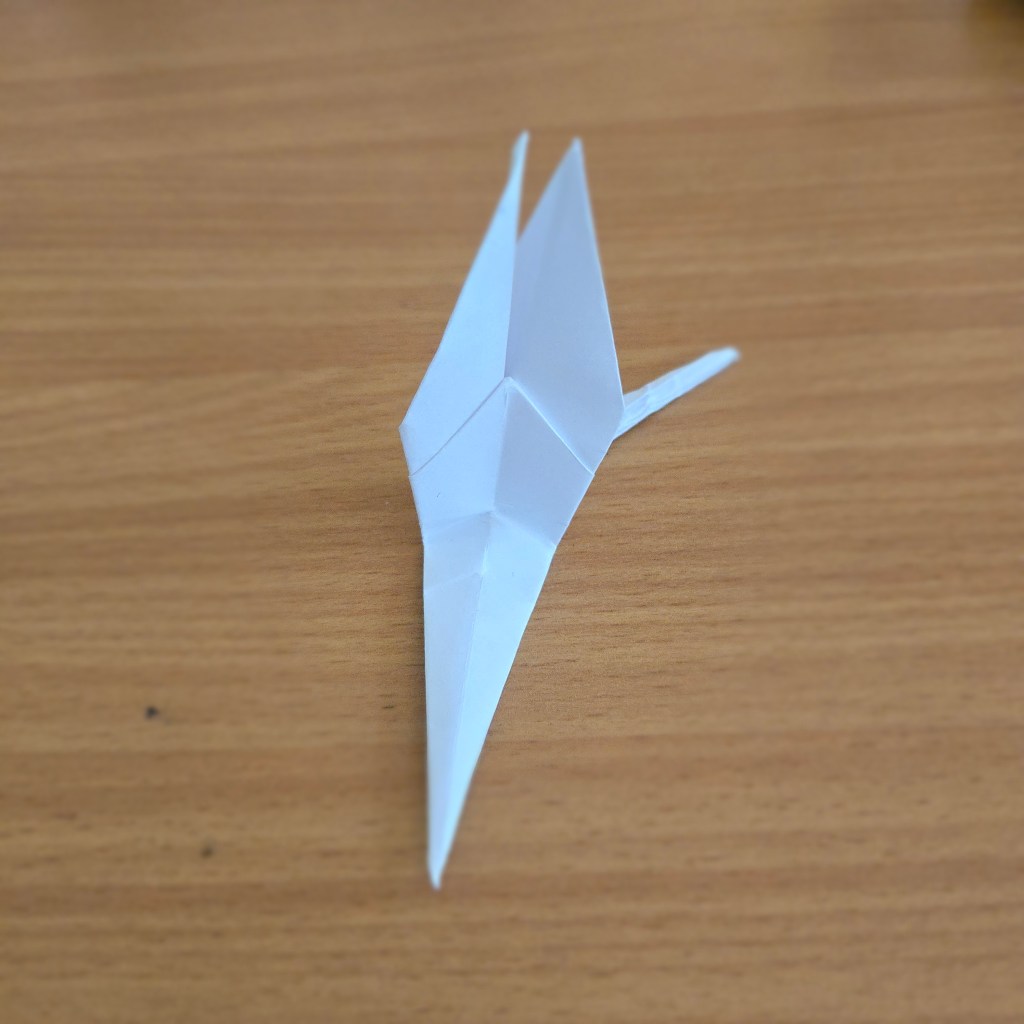
5. Fold the top half of the kite towards the bottom, creasing and unfolding.
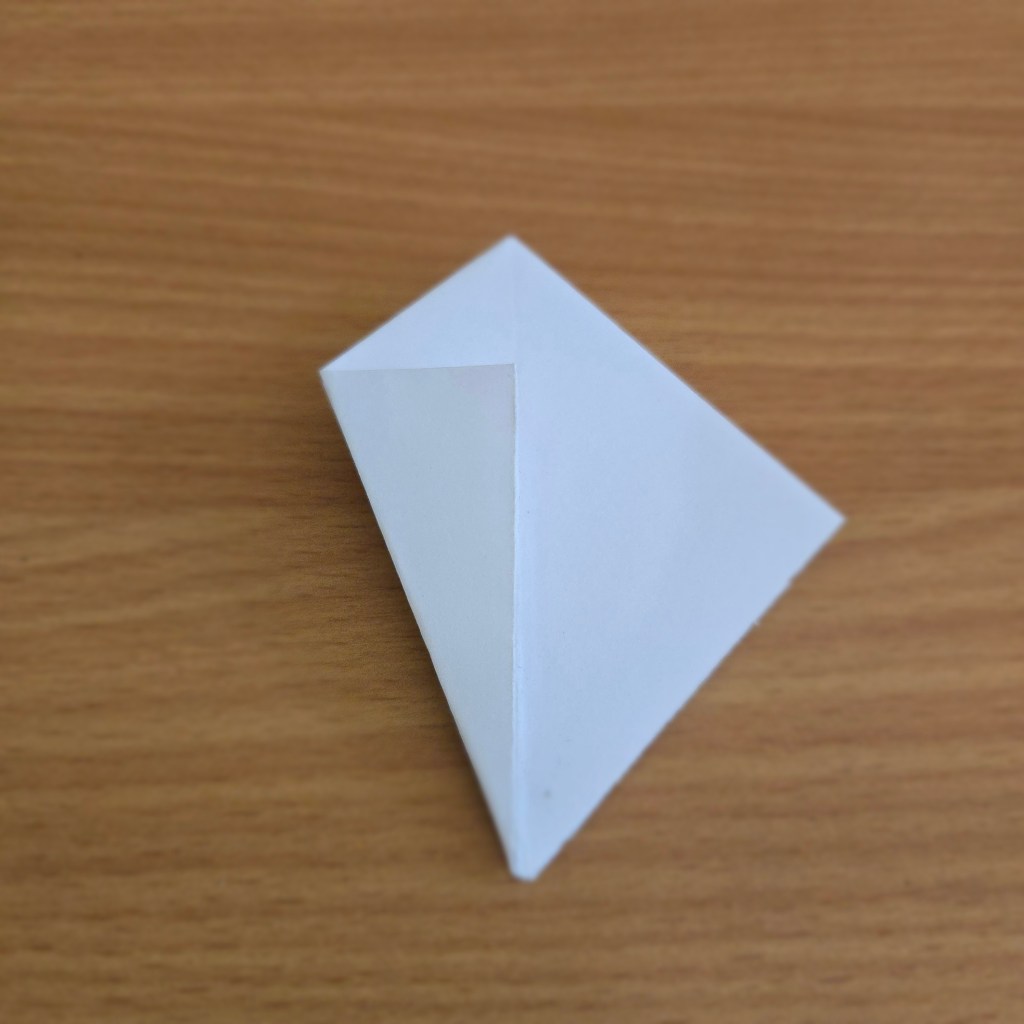
6. Open up the side flaps and slightly open the bottom of the paper.

7. Using the crease from step 5, fold the flap at the bottom up to the top. The side creases can also be folded over. You should end up with a long diamond shape.
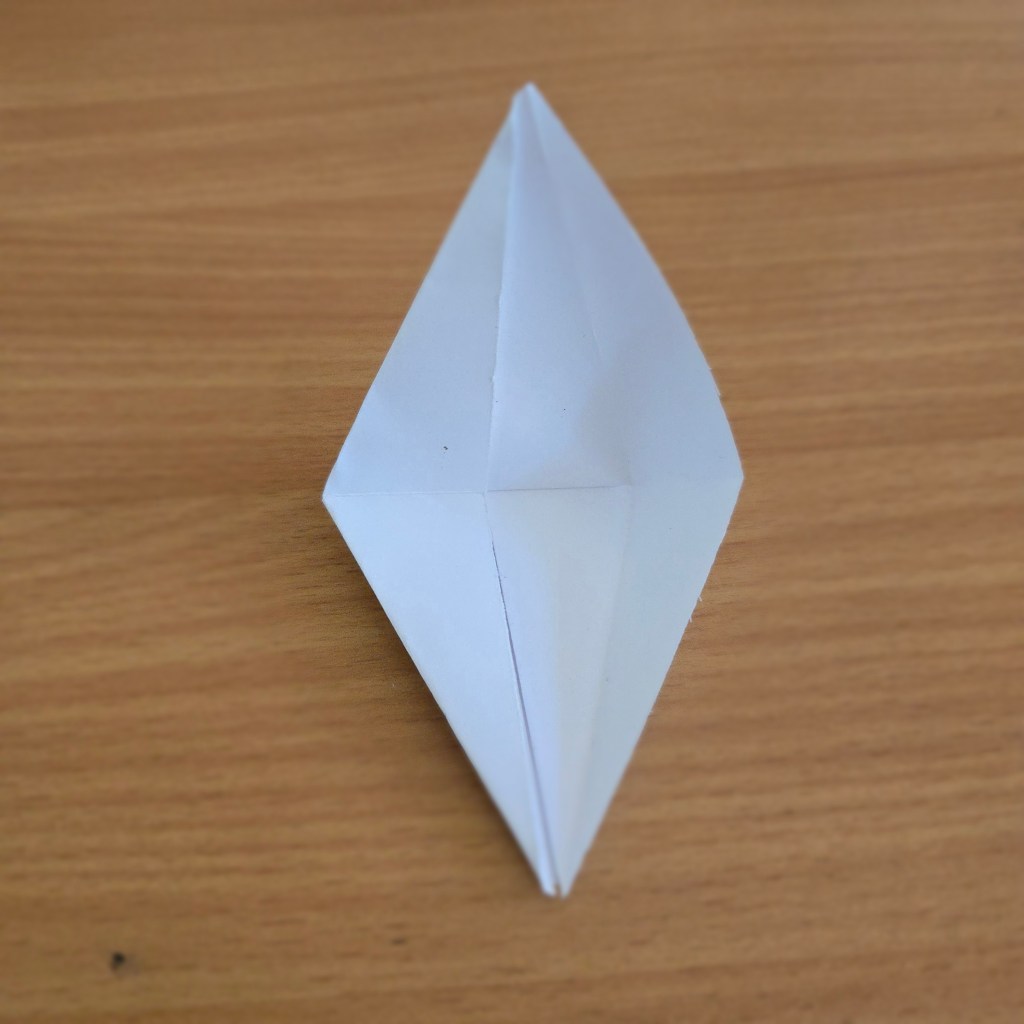
8. Flip the paper over and repeat steps 6 and 7 for this side.
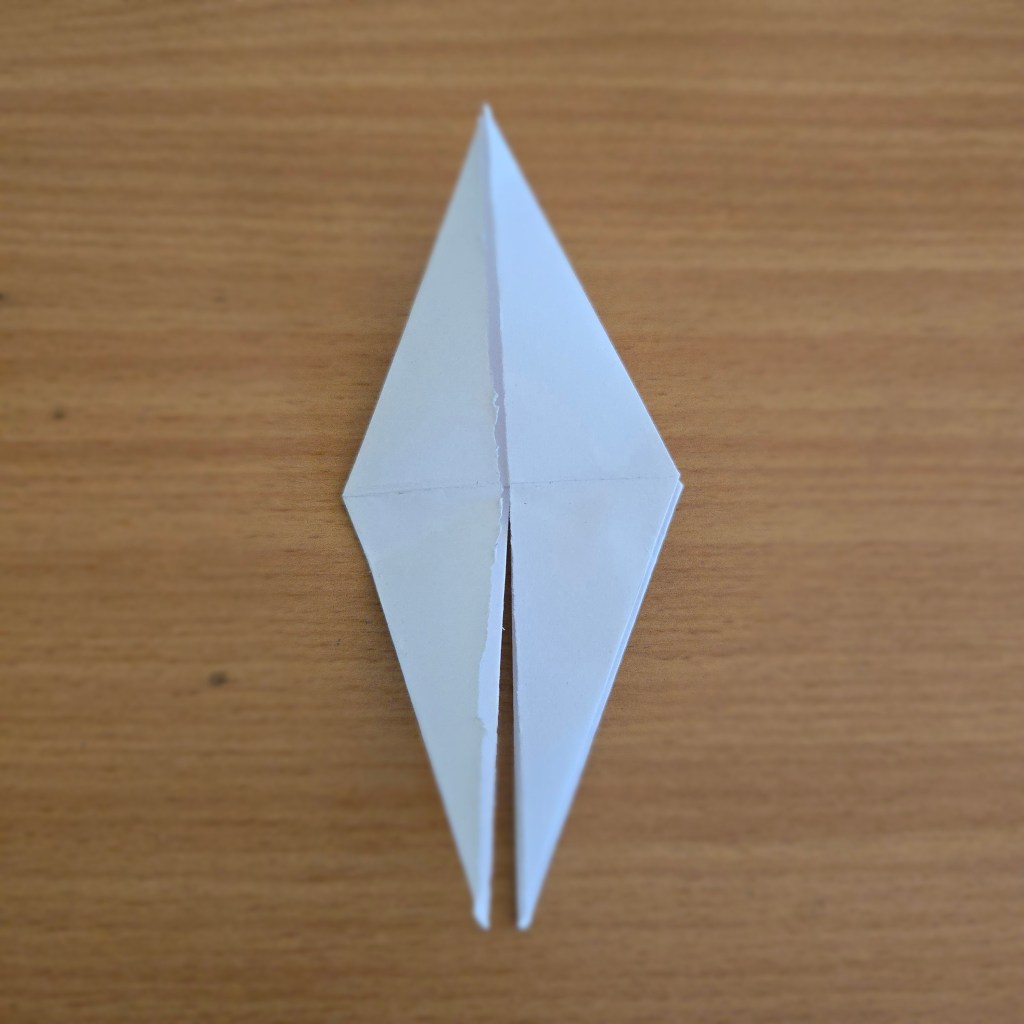
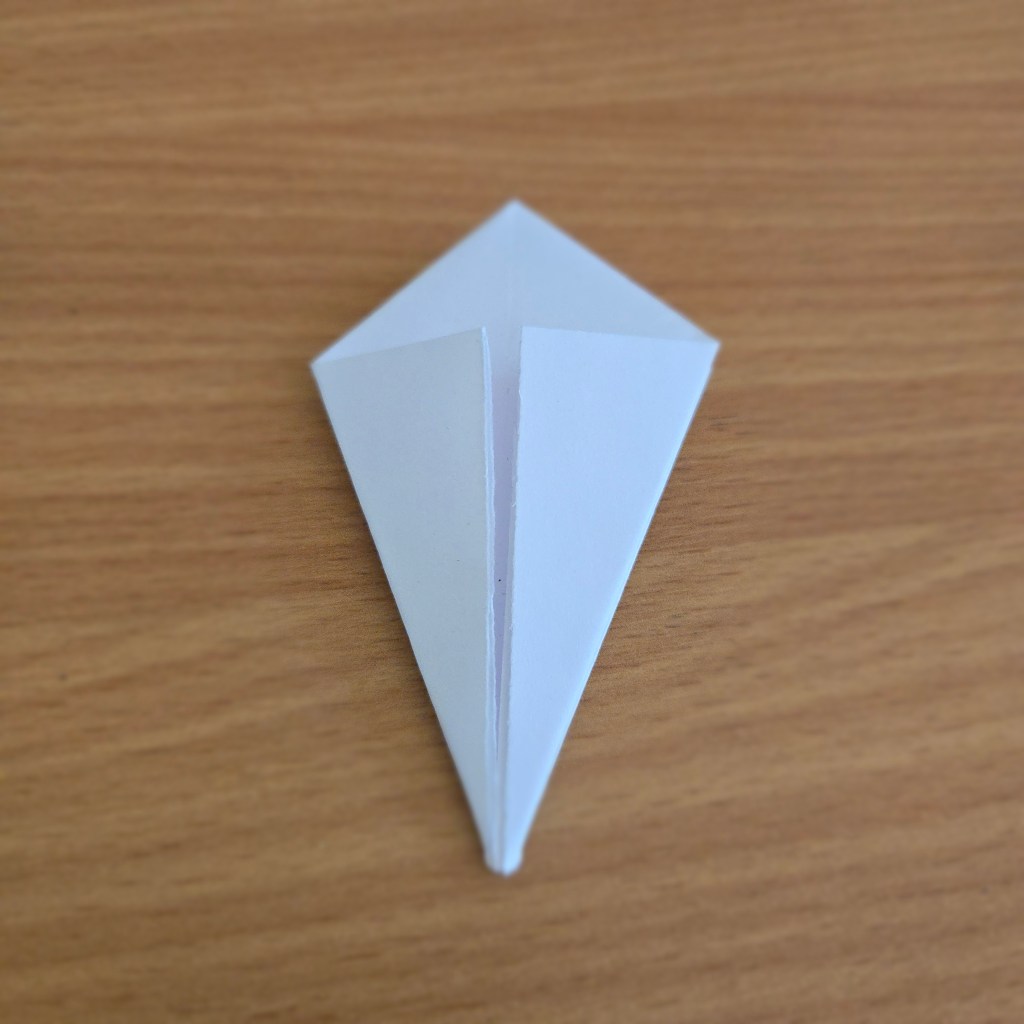
9. Fold the side corners into the middle similar to step 2.
10. Flip the paper over and repeat step 9 for this side.
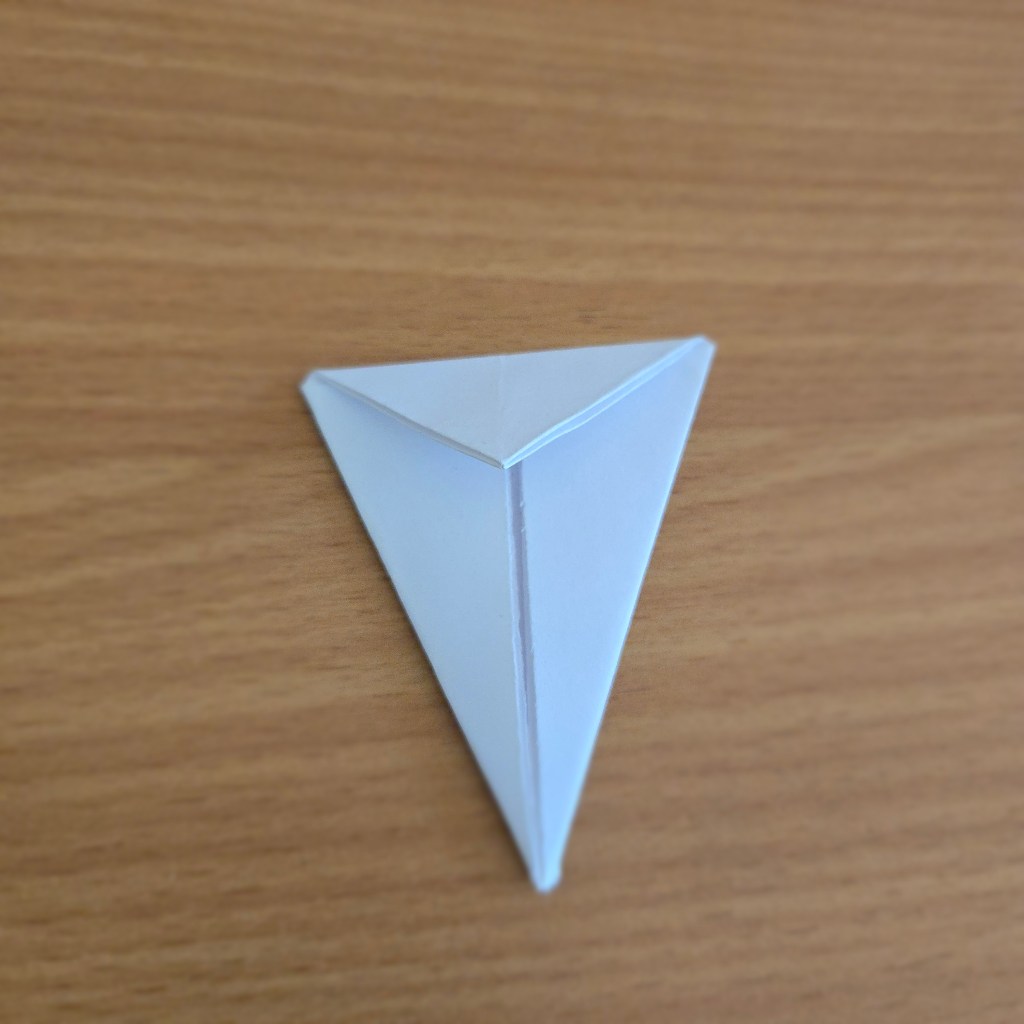
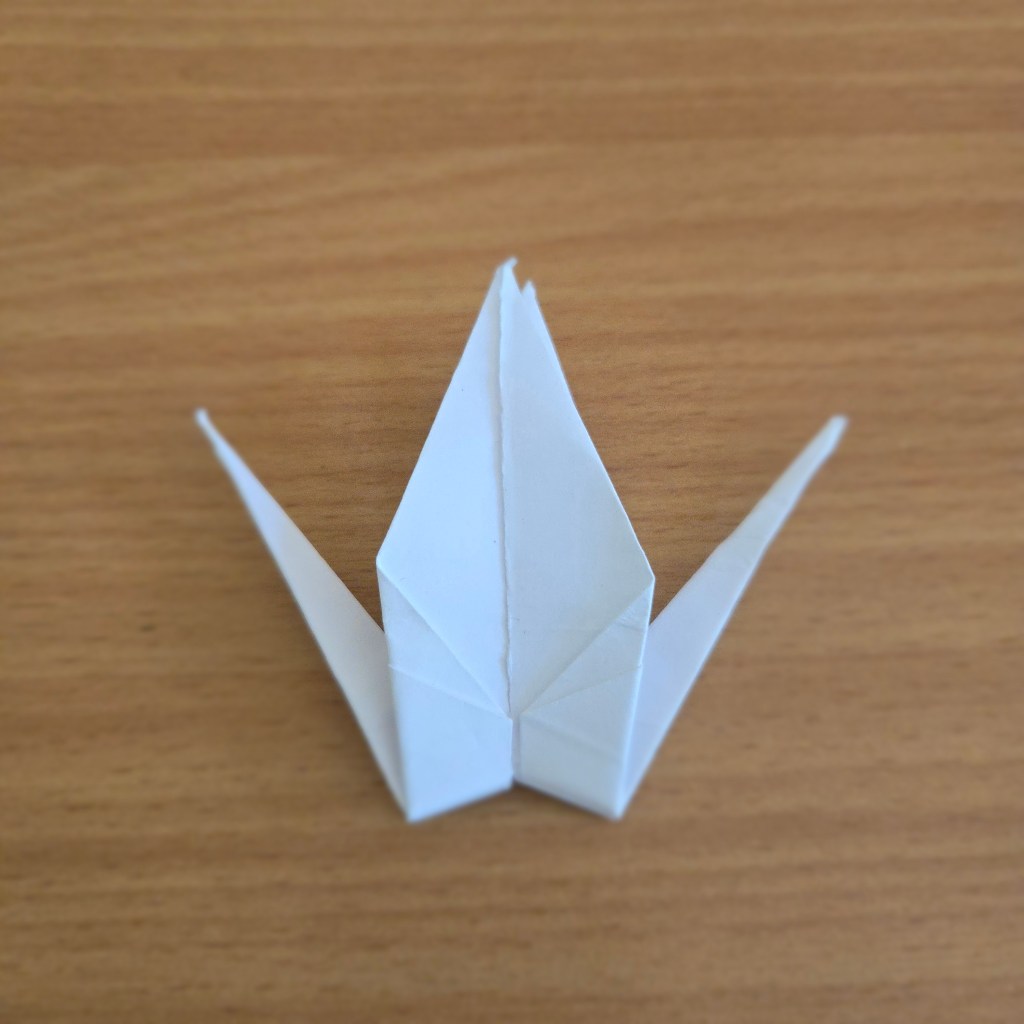
11. The two lower points should be free from each other, fold the left side point up on itself so that it juts out far to the left.
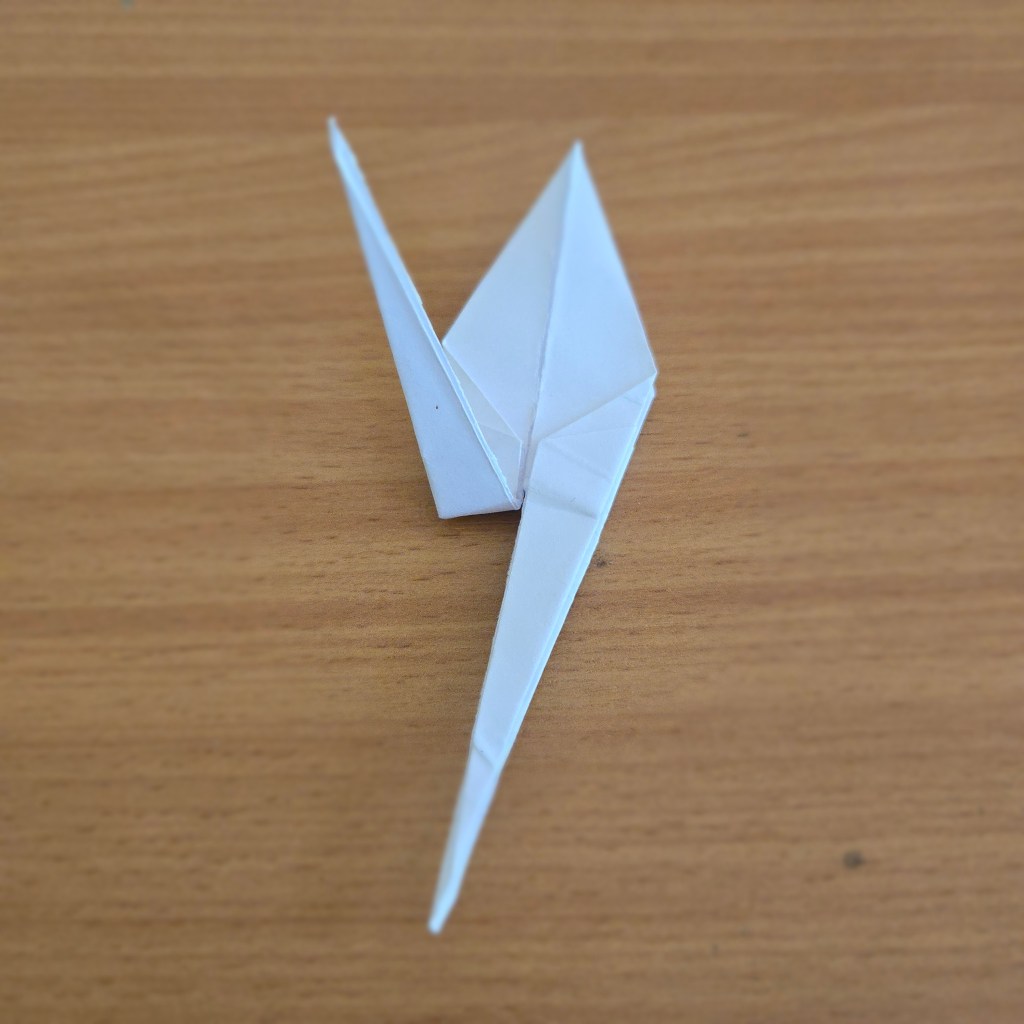
12. Copy step 11 for the right-hand side. Then unfold both.
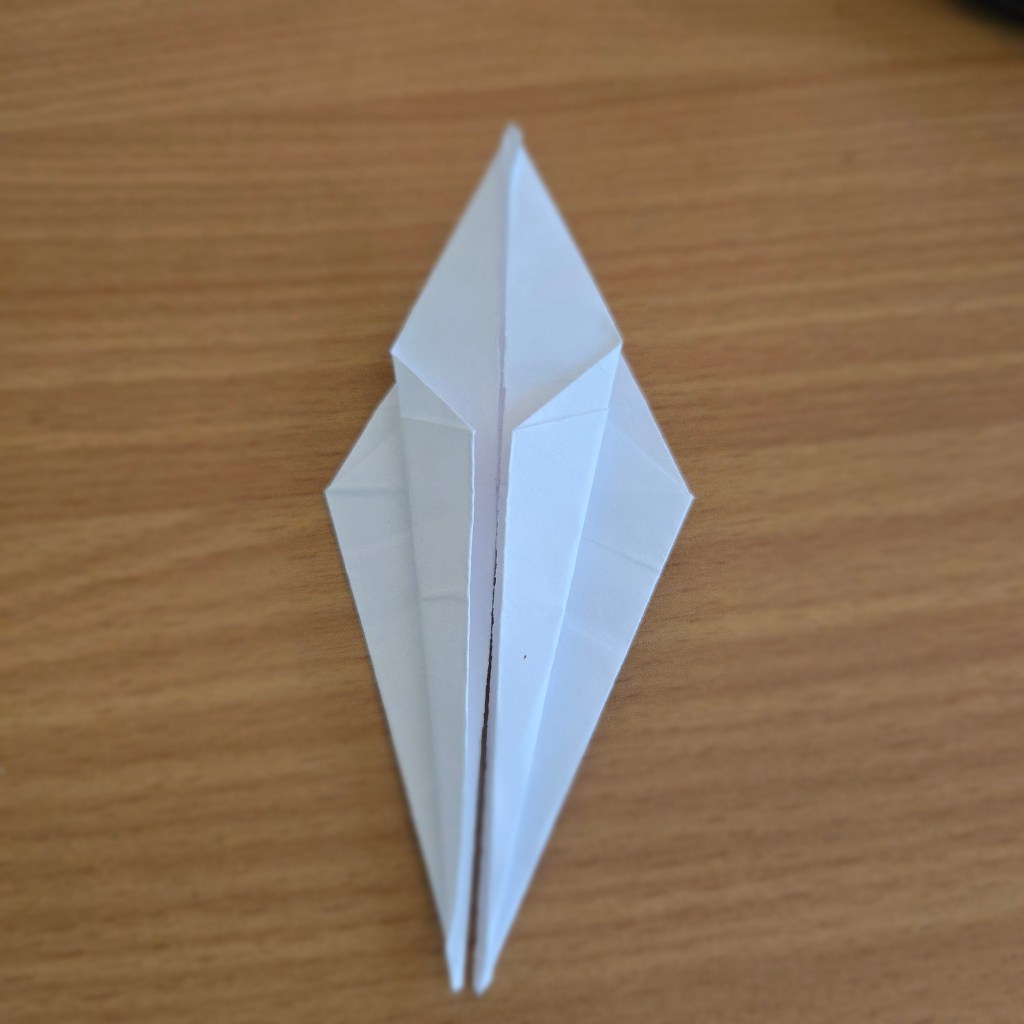
13. Open up the left side of the paper. Then, using the crease from step 11, fold the point inwards and upwards.
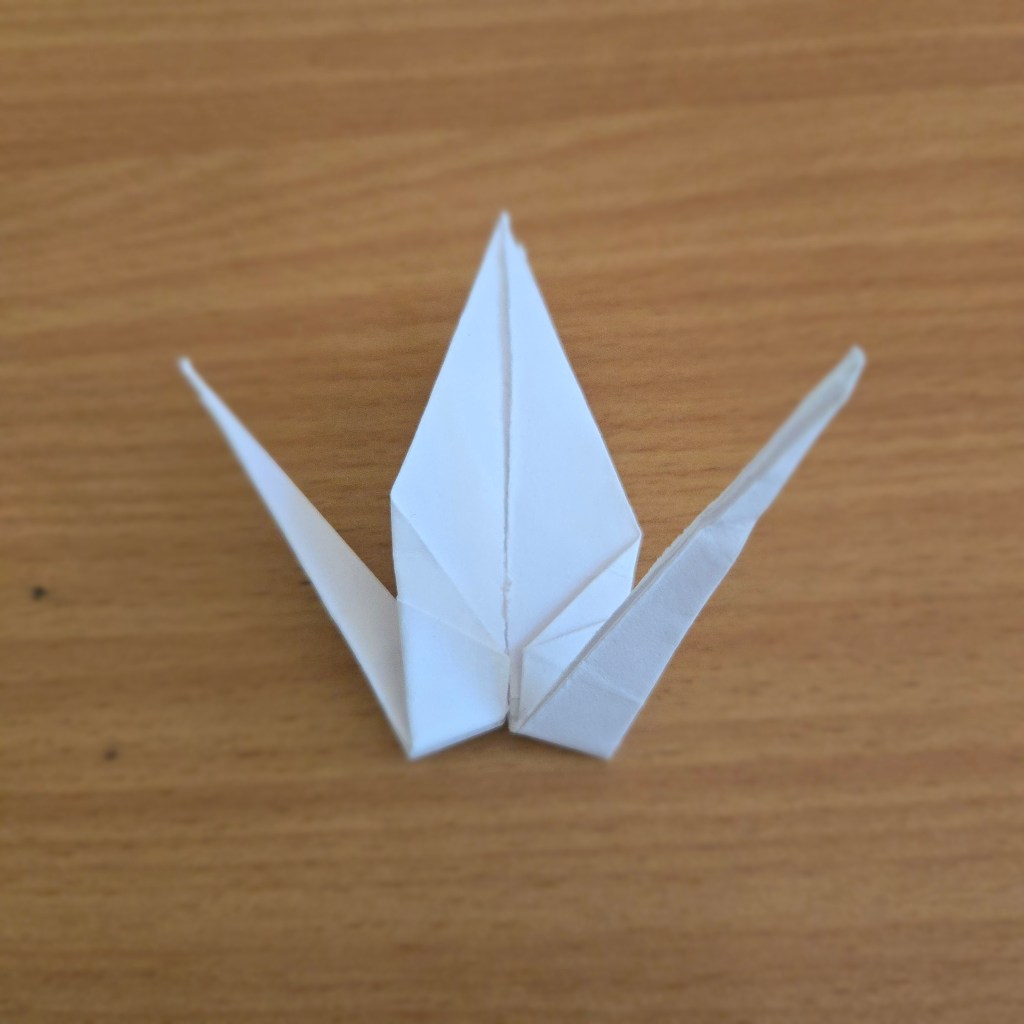
14. Repeat step 13 for the right side.
15. Fold part of the right prong down on itself to form a beak.
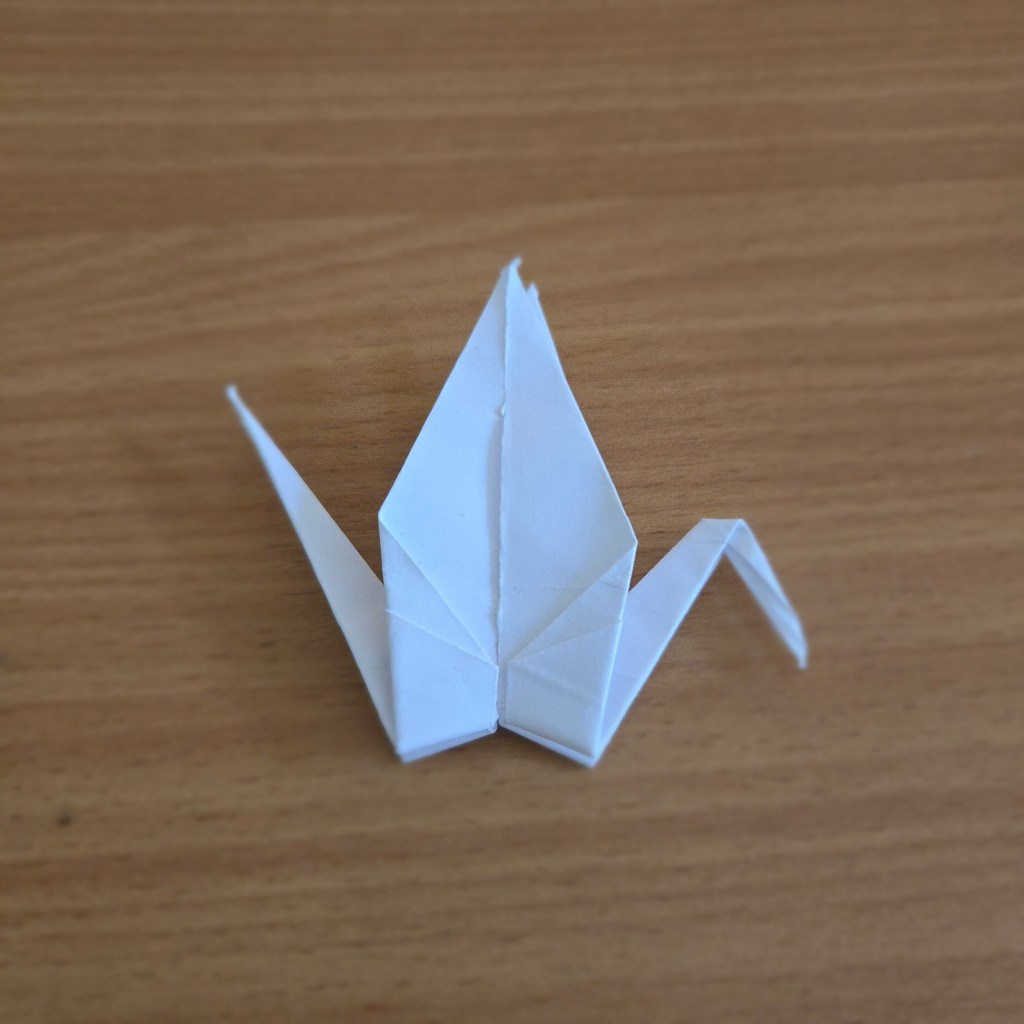
16. Fold the middle part down on itself and repeat for the other side.
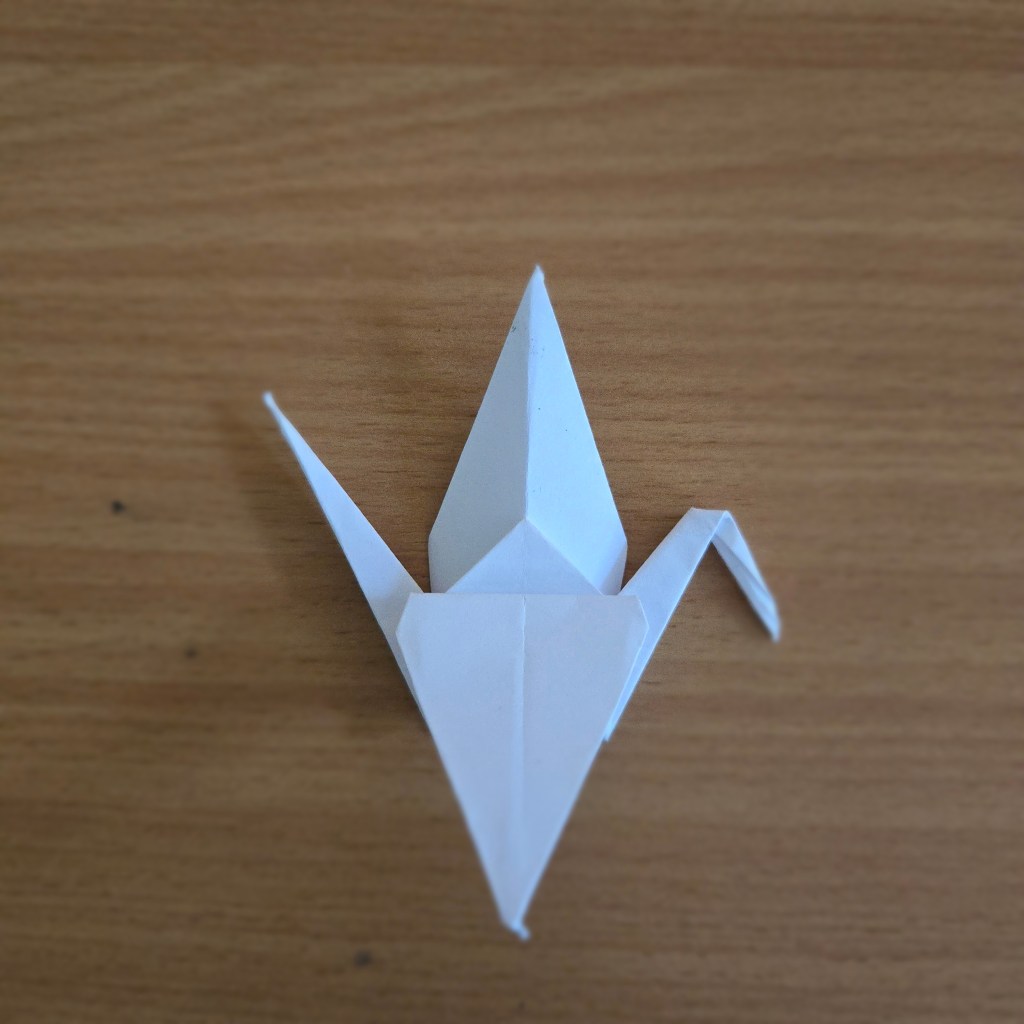
17. Stand your Crane up on the table!
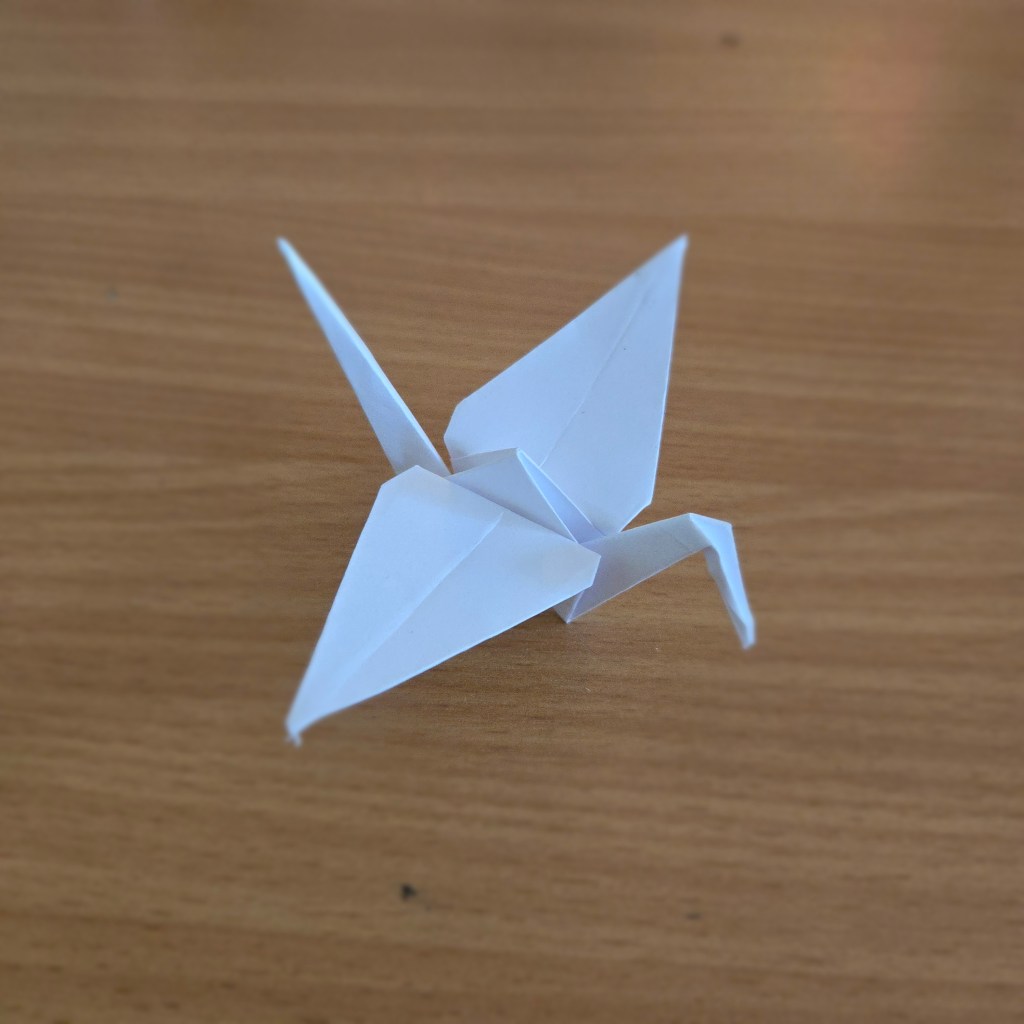
That’s one down, if I make nine hundred and ninety nine more, I get my wish; I think I know what I’d wish for, do you?
As mentioned, origami cranes are symbols of peace for the Japanese but there are lots of other things that can be made from paper. Origami is an ancient craft and forms only a small part of the fascinating Japanese culture; so I may find myself returning to this skill soon and creating a few more objects. If you want that too, be sure to let me know!
Thanks for reading, if you made a Crane from my instructions send me a picture of it, I’d love to see what amazing things you can all create.
Jaa Mata,
Cassie

Leave a comment